How To Speed Up Your Laptop
We depend on our laptops every day for both work and play – so when your laptop slows down, your life slows down. While we’d all love to upgrade to a shiny, brand new laptop with the highest specs available, that’s not a realistic solution for everybody.
Luckily, there are several ways to speed up your laptop without throwing it out entirely. In this article we will teach you how to make your laptop faster using a few simple tips.
General Laptop Tips
Both Mac and Windows laptops can get sluggish over time, and this is down to a number of reasons: from having too little memory and storage, to overheating. With some clean up and care, you can greatly enhance the speed and efficiency of your laptop.
The methods for cleaning up and fine-tuning your laptop are different depending on whether you have a Windows or a Mac laptop. The rest of the article will explain each of these in more detail, but generally, the following steps will help to speed up your laptop:
• Update your operating system
• Monitor CPU activity
• Stop software and applications from launching on start-up
• Close unnecessary apps
• Monitor disk space
• Clean up your disk drive
• Cull unnecessary software and files
• Upgrade your software
Tips For Mac Users
Macs are high-spec, efficient machines – but there are ways to speed up Mac laptops that are getting old. Over time, bad habits and a buildup of files and software can slow down your laptop. Here are some solutions for Mac laptops:
1. Check for and install OS X updates
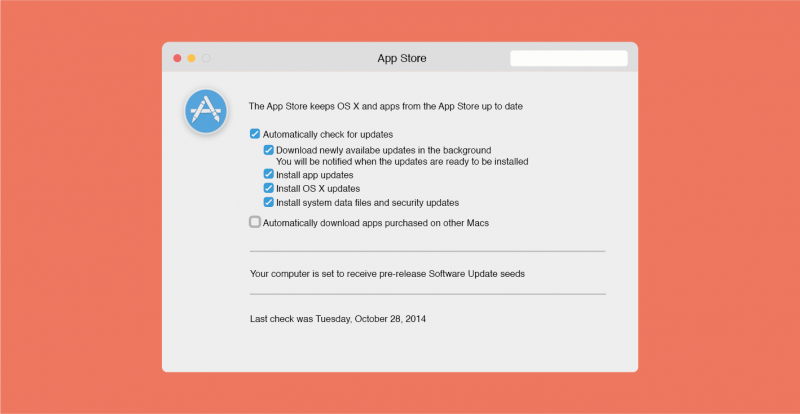
Updating the operating system makes your laptop run more efficiently, and ensures that any apps you download are working at their best. If you haven’t set your preferences to update OS X automatically, you’ll have to do this yourself.
To check for updates, click on the Apple logo in the top left corner of the screen. From here, click System Preferences. When the menu pops up, click through with a single click to ‘App Store.’ From here, you can change your preferences to ensure that your Mac updates OS X automatically, as well as checks for any app updates available via the app store.
Here you can also click ‘Check For Updates’ at the bottom of this menu screen, and you can get your laptop up to scratch.
2. Clean up unnecessary apps
This is a simple but very effective tip. Check which apps are running in the background, and make sure to shut them down completely – not just minimise them.
Macs are very good at hiding apps away when they’re not in use, but they are often still running endlessly in the background. You can sometimes have apps that have been running for weeks in the background that you’ve simply forgotten about.
Your first port of call will be to check the Dock – any app that is currently running will be marked with a small dot. If you can’t see any dots in the Dock, you’ll need to turn on indicator lights. To do so, go to the System Preferences menu (click the Apple logo in the top left to find this menu,) and click ‘Dock.’ Here, ensure that the ‘Show indicator lights for open applications’ has been selected.
Now that the still-running apps have been identified, all you have to do is shut them down completely. The quickest way is with a simple right-click or ctrl + click on the icon displayed with the dock, and to select the Quit function.
If an app stalls and does not quit, you can use the Force Quit function, which you can find by clicking on the Apple logo in the top left, and then clicking Force Quit. Here, you can select the unresponsive apps and have them shut down externally.
This is also a good time to check for apps that you don’t really use, but are sitting in your hard drive and taking up space. Be brutal and uninstall them from your Mac. In most cases, all this requires is opening a Finder window from your Dock and looking at your Applications folder.
You should be able to uninstall the majority of apps by simply right clicking or ctrl+clicking on the apps in this folder and clicking Move To Trash. In some cases, the application cannot be deleted, or requires uninstalling via a proprietary app within the application’s additional files.
3. Check The Activity Monitor
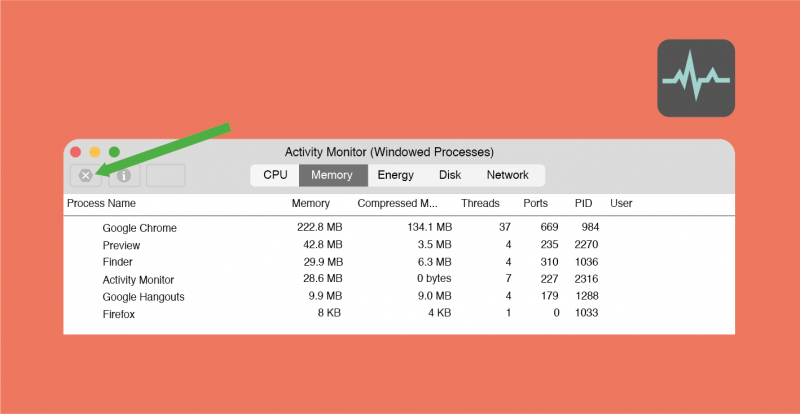
Your Mac’s activity monitor can seem daunting at first, but understanding the information it provides is very important. Essentially, it shows you which apps are using up your laptop’s resources – and therefore making your Mac slower.
To find it, simply hit cmd + space on your laptop and type in Activity Monitor. Hit enter, and the Activity Monitor should open. Alternatively, you can navigate to it manually from within your Utilities folder.
What you’re seeing is a breakdown of all the processes your Mac is either running right now or has run recently. When you first open it, this will include vital processes that your laptop needs to run and that you should not attempt to shut down.
To hide vital processes from view, click View and navigate to Windowed Processes. In this new view, you can see which applications are eating up the processing power of your Mac.
You can shut down apps directly from within the Activity Monitor by selecting them and clicking on the X inside of an octagon in the top left of the Activity Monitor.
Take note of any apps that seem to be using a large percentage of CPU – this could be because they are not up to date, and you should check for updates of those particular apps.
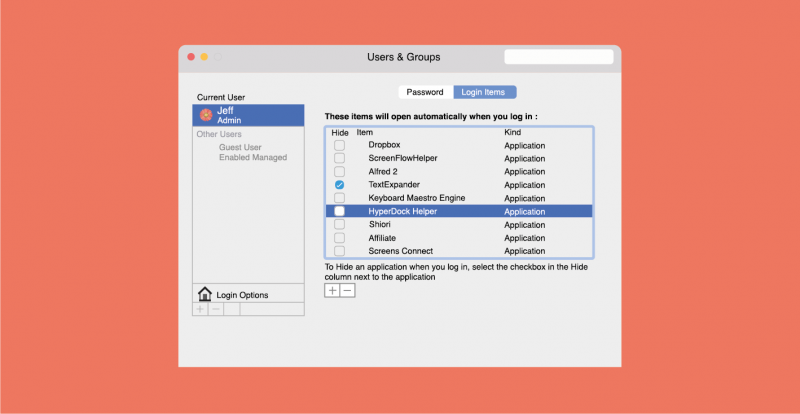
4. Disable ‘Launch On Startup’
5. Free up storage space
You can easily see what is taking up storage (and therefore memory and processing power) by clicking on About This Mac – you can find this by clicking on the Apple logo in the top left of your Mac’s screen.
After opening About This Mac, click through to the Storage tab. Here, you’ll see a breakdown of how your Mac’s storage is being used. To run efficiently, you should try to keep about 10% of your storage free. If you don’t – it’s time to clean up your flash storage. Look at where most of your space is going – the display should show you a bar with clear information on what types of files are taking up the most space.
Use a back-up storage system like an external hard drive or online storage to save large files somewhere other than your hard drive, and remember to remove them from your laptop once they have been backed up.
Another quick way to free up storage space is to clear your Trash. If you don’t have this set to clear automatically at regular intervals, it can hold on to large files for months or longer. To do so, click on your Trash in the Dock, and in the Trash finder window, click the settings cog. Select Empty Trash and free your mac from the shackles of useless files!
Tips For Windows Users
While the dressing and UX for Windows is different to that of a Mac, many of the basic tenets of how you can speed up your laptop are similar.
You should be able to get your Windows laptop back in shape without spending any money, but it’s always worth considering upgrading your hard drive.
If your hard drive is a traditional one, it could be time to upgrade to a modern SSD hard drive. This will have an immediate and dramatic effect on the speed of your laptop, and is certainly worth the investment.
If you already have an SSD, or if you simply can’t upgrade now, there are still a few things you can try to speed up your Windows laptop or PC. There are some differences between how to speed up a device running Windows 7, Windows 8 or Windows 10 – but even these differences can be boiled down to the following methods.
1. Stop programs from launching at startup
Windows is notorious for installing apps and automatically applying the ‘launch at startup’ setting. It’s very unlikely you’ll need to use all the programs that launch at startup every time you open your laptop, so you can change this setting to stop it from happening every time you boot up.
To disable this setting, go to the taskbar and click the arrow pointing upwards to display your notification icons. Here, you will see a list of programs that load when Windows boots up. While many of these should be left to run (such as antivirus software), many of these are unnecessary.
Go through each of these and use the right-click function to bring up their individual Settings menus. From here, you can disable the ‘start automatically with Windows’ option.
2. Use the Task Manager
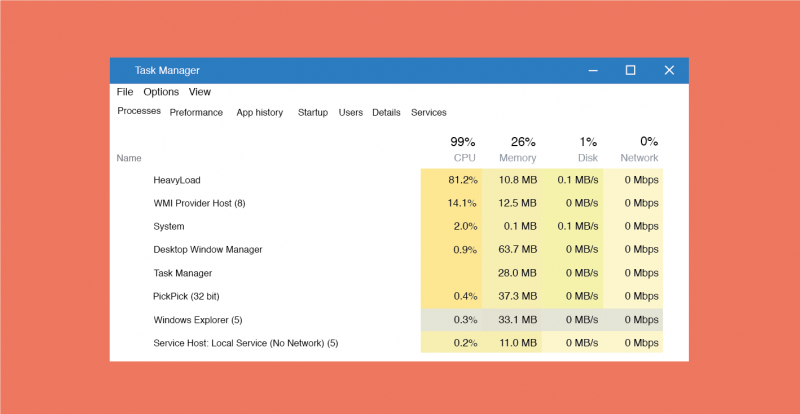
The Task Manager in Windows 10 will give you an overview of which processes are using up CPU and memory, and how much impact your programs are having on performance.
To open the Task Manager, right click on the task-bar and choose Task Manager. From here, you can click on the Startup tab to select programmes and disable the startup function. Be very careful, though – some processes are vital.
Go through the list of apps that launch at startup and use Google to decide whether they are useful and necessary for your laptop’s processes.
The information provided in the Task Manager will also show you which apps may be running in the background and should be shut down. Checking this whenever your Windows laptop feels slow or inefficient will show you where you can make a quick change for an instant speed boost.
3. Check for malware and viruses
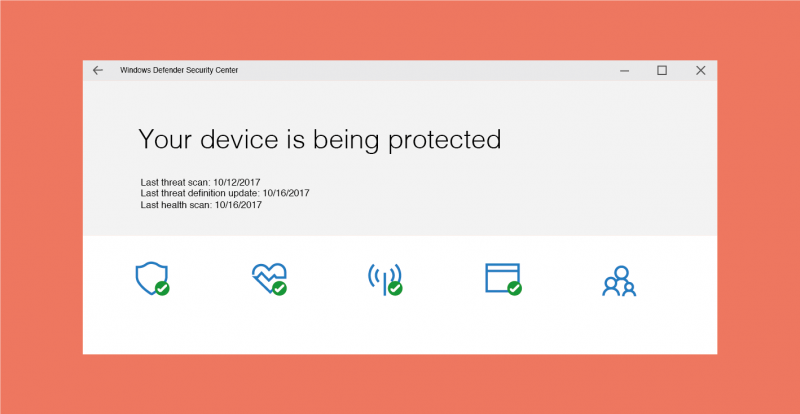
Windows laptops are vulnerable to viruses and malware that can run software in secret and really weigh down your laptop. A powerful way to speed up your windows laptop is to spend some time running security checks and dealing with any damage.
If you use Windows Defender, you should be able to manually run a full scan of your device. You will be able to find Windows Defender via your Start Menu, and clicking through to Settings and on to Update and Security.
Any large software or malicious programs that are running should be easy to detect, and your antivirus or Windows security program will be able to show you how to deal with the issue and remove the malware.
4. Change your visual effects settings
Windows 10 in particular is a visually elaborate operating system, that uses animations, graphics and beautiful transitions throughout the operating system.
While they’re fun to look at and explore when you first get your Windows laptop, they can soon clog up your processing and are unnecessary. You can turn these off and get your laptop running much faster.
To turn off the visual effects, open the Start Menu and type ‘advanced system settings.’ The top result will open a window with a section labelled Performance. Click through to the Settings here and the display will show a list of visual effects. Simply untick the unnecessary, CPU-guzzling effects and click ‘OK’ to the changes.
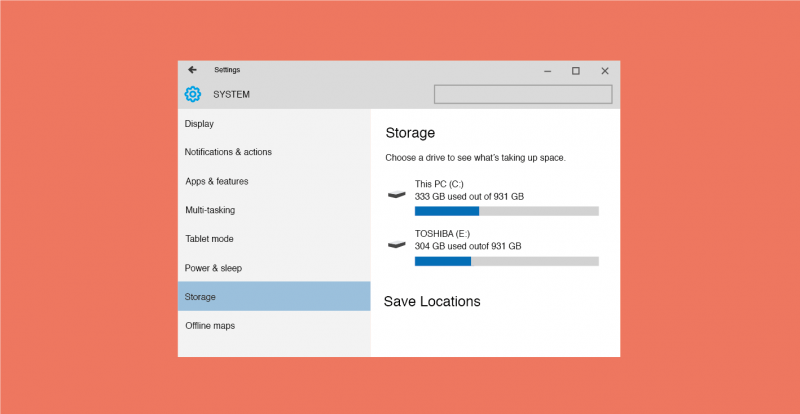
5. Free up storage space
The quickest and easiest fix for speeding up any laptop is to take a look at where your storage is being spent – do you horde music or games or other large files? Use external storage such as an external hard drive or use a cloud service to take files off your laptop and free up precious space.
While you’re removing files, check for Windows updates and updates of software that you decide to keep on your laptop. Making sure the programs you do keep are up to date will ensure they are running at peak efficiency.
Conclusion
Whether you have a Mac or a Windows laptop, you will always be able to find ways to make your laptop that little bit faster. You don’t need to upgrade your hardware by buying an expensive new laptop. Instead, follow the tips in this article and you will see the efficiency of your laptop increase. We can’t guarantee it’ll be as good as new – but it’ll be close!
Don’t forget – if you want to protect your laptop from the more unfixable issues, like mechanical breakdown, our laptop insurance will cover you.


